In light of our recent announcement of our partnership with Router Protocol and listing on Dfyn L2 Exchange, we have put together a series of useful information about the things you need to know in order to participate in the GalaxyFarm 2 liquidity farming program (read our initial announcement here).
How to participate in the GalaxyFarm 2 liquidity farming program?
Let’s take a look at the first piece of this, which if Polygon (formarly Matic Network).
What is Polygon/Matic Network
Rebranded from “Matic Network” in February 2021, Polygon is a layer-2 network designed to bring mass scalability to Ethereum and interoperability between other blockchains. Retaining the MATIC cryptocurrency ticker, Polygon is evolving into a platform to help developers bring products to market quickly. This is achieved using customizable, modular blockchain network tools and services that harness the power of the Ethereum network, without the drawbacks associated with high transaction fees and network congestion.
Described as “Ethereum’s internet of blockchains”, Polygon has become a compelling alternative for several new up-and-coming projects as the completion of Ethereum 2.0 still lurks somewhere in the distance. This is largely due to the high throughput and low gas fees experienced by users and developers, afforded by Polygon.
Here’s a short description of how Polygon/Matic Network works:
- User deposits crypto assets in the Matic contract on mainchain (ie. Ethereum blockchain)
- Once deposited tokens get confirmed on the main chain, the corresponding tokens will get reflected on the Matic chain.
- The user can now transfer tokens to anyone they want instantly with negligible fees. Matic chain has fasterblocks (approximately 1 second or less). That way, the transfer will be done almost instantly.
- Once a user is ready, they can withdraw remaining tokens from the main chain by establishing proof of remaining tokens on Root contract (contract deployed on Ethereum chain)
How to Set Up Polygon (Matic) Mainnet for MetaMask & Transfer Assets from L1 to L2
The first step is to download and set-up a MetaMask wallet. MetaMask is a free and secure browser extension that allows users to seamlessly interact with the Ethereum blockchain. If you haven’t already, you can download and configure MetaMask here.
Once you’re ready to go with a MetaMask wallet, the next step is to connect MetaMask to the Polygon (Matic Network) Mainnet.
How to Set up MetaMask for Polygon (Matic)
You’ll need to configure the Matic Network custom RPC to your MetaMask. It’s pretty simple and straightforward, and it’s easy to switch back and forth between Layer 1 and Layer 2 using the button near the top of the MetaMask application.
To add Matic’s Mainnet, click on the Network selection dropdown and then click on Custom RPC.
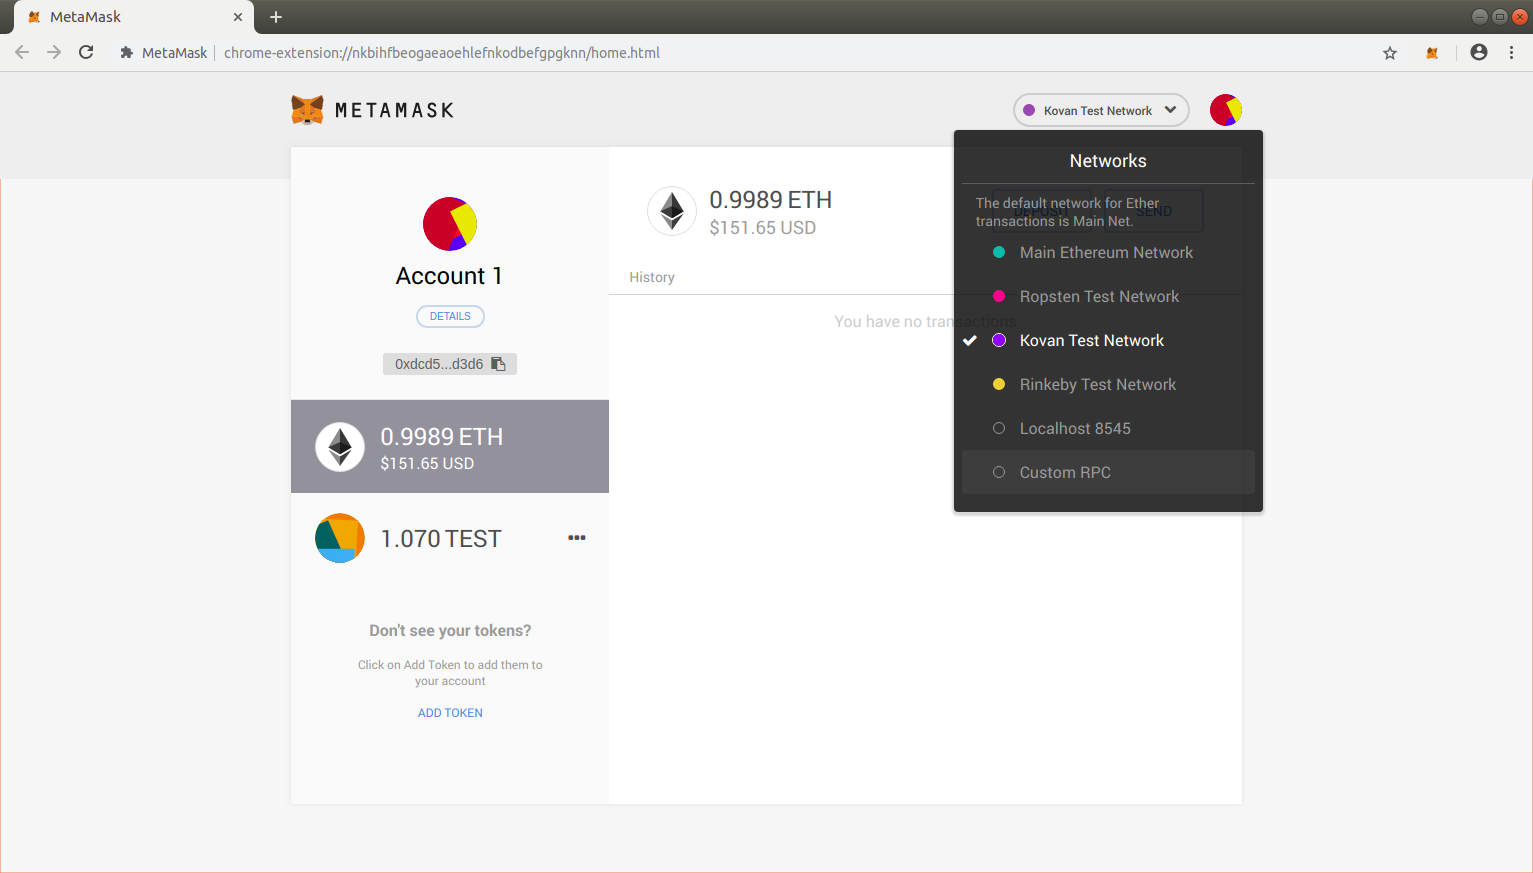
It will open up a form with 2 tabs on the top, Settings and Info. In the Settings tab you can add the URL https://rpc-mainnet.maticvigil.com/.
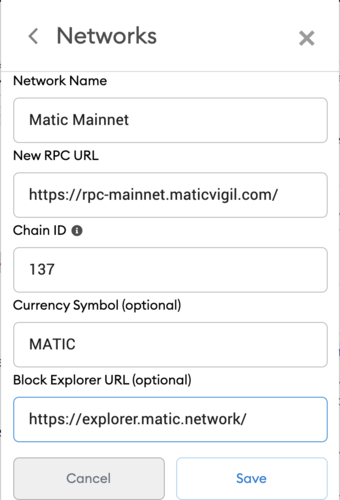
Once you’ve added the URL in the New Network field, click on Save. You will be directly switched to Matic’s Mainnet now in the network dropdown list. You can now close the dialog.
Setting up your Polygon Web Wallet
You’re now able to operate on the Matic Network, but that’s not going to do you any good without a Matic wallet. You can access the Matic web wallet here: https://wallet.matic.network
Once you access your wallet, connect it to your MetaMask account with Ethereum mainnet selected as the network. Confirm the connection in MetaMask, and it will navigate back to the Matic Wallet interface.
If you don’t own any MATIC already, setting up this wallet will give you 0.1 MATIC for free.
Transferring your assets from the Ethereum Mainchain to the Matic Mainnet
From here, moving funds from Ethereum to Matic is easy!
From the Matic wallet, click “Move funds to Matic Mainnet”.
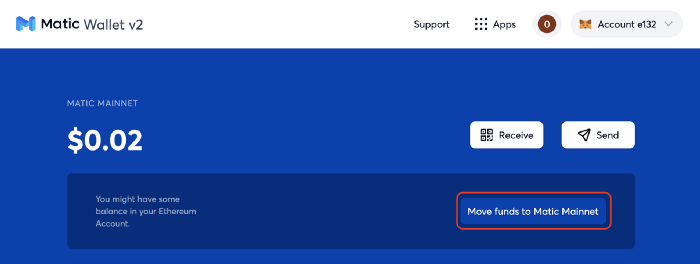
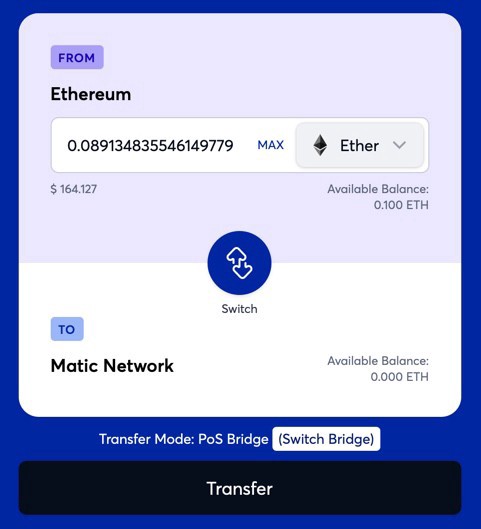
Make sure you have the “PoS Bridge” selected as the transfer mode. Then, click “Transfer”.
This warning will come up. Check out what’s supported, then click “Continue”.
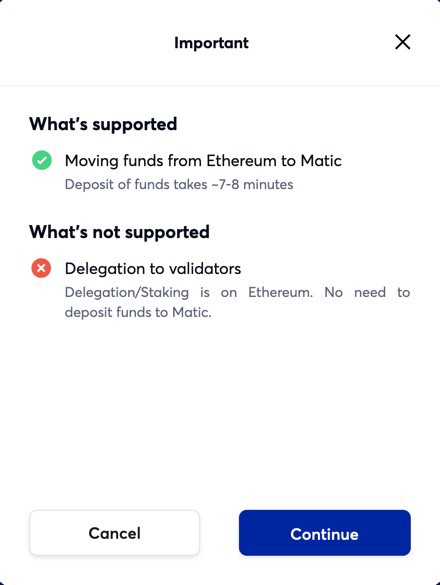
Click “Continue” again to complete your deposit.
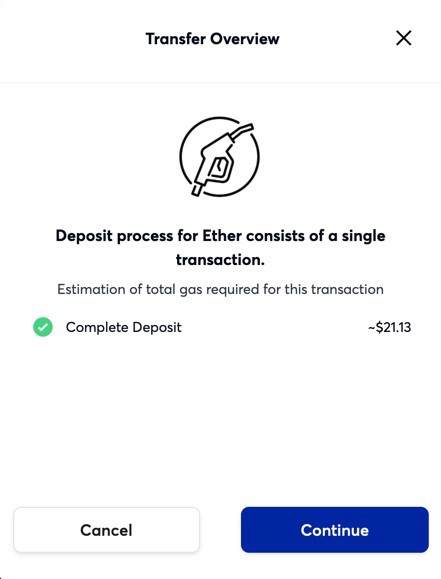
Then, click “Continue” again to confirm your transfer.
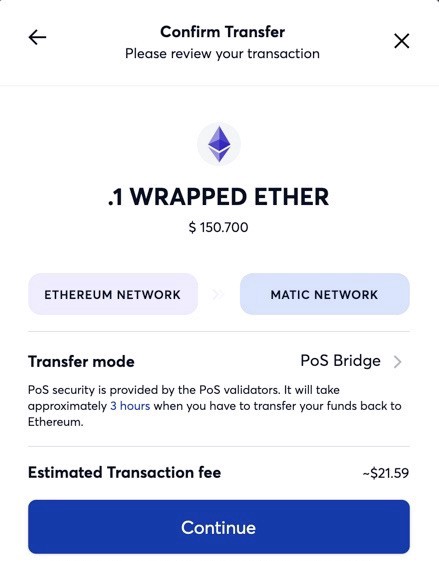
Click “Continue”.
Your MetaMask wallet will open. Click “Confirm”.
You will see the following screen:
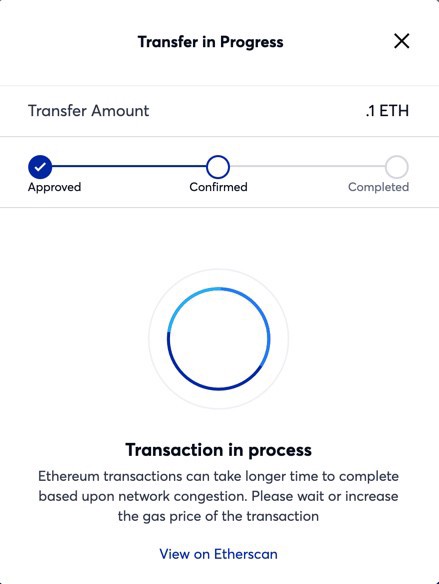
Wait for the transaction to process. Depending on network demand, this can take several minutes. You can track its progress if you like on Etherscan.
Once your transaction has completed, you will see this screen:
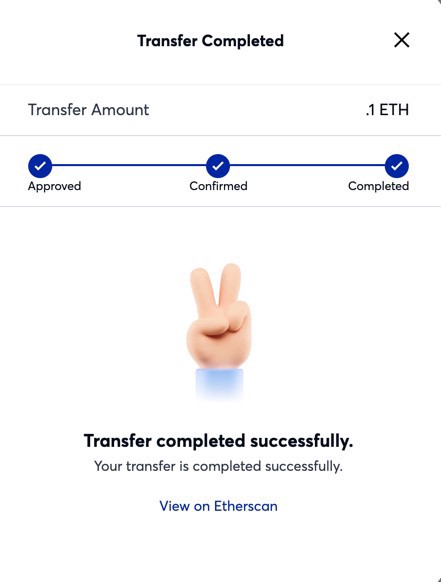
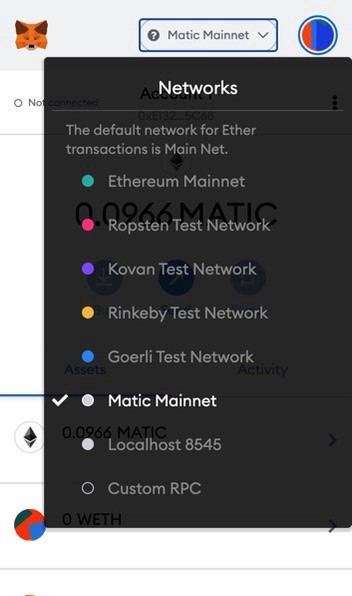
Next, open MetaMask, select “Matic Mainnet” from the drop down menu, and you’re ready to interact with layer 2!
With this information, you are now ready to move your tokens from Ethereum’s L1 to Polygon/Matic’s L2 mainnet.
Also, have a look on how to add custom tokens in MetaMask, as it might become useful later on: https://docs.matic.network/docs/develop/metamask/custom-tokens/
We’ll be back with more information very soon on how you can participate in the GalaxyFarm 2 pool.

